


Alternation time
Dear all:Recently found out that a customer who was 3 years ago complained that we could not did alternation within same day she tried on the gown. And she came in time is 7:30pm which we almost closed. She request us to alter it at same time. Although it is really impossible, in the end we still did it for her and that day when finished is 9:30pm. Want to clarify,each gown alternation day is around 2-3 days, however if customer need it rush usually we will rush for customers to make each customer happy with our service. But we hope customers can leave enough time to tailor make gown in advance, usually we take one and half month to two months tailor making a gown. So plus alternation or any in case better in 3 months in advance. For those time not enough we would like to rush for customers, but also hope even customers can not appreciate our effort, also pls understand we trying best to finish all works in time. Neoromantic wish each couple have a nice wedding!
Album print service
Neoromantic also provide album print service, details pls refer this link http://www.photoalbum.neoweddinggown.com/
New arrival
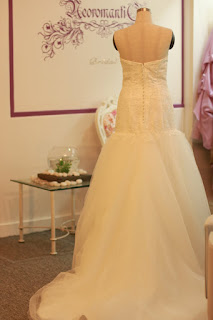
New arrival, welcome those customers who interested in lace gown walk in and try on them



Neoromantic close tomorrow
Neoromantic will close on 31st of May, Thur to replace public holiday of 2nd June,12. So we open on 1st and 2nd June. Welcome to call us at 012-6661945 if any question.

Tailor make wedding gown for rental
Neoromantic Bridal now is offering tailor make wedding gown for rental. Time is limited, don't miss out. Hurry to sign up!


We are close on Labour Day!
Dear All:
Neoromantic Bridal Sdn Bhd will close on 1st May, Tue. If u need to make appointment during our holiday can call erin at 012-6661945. Happy Labour Day!
Different tie knot


Windsor
Often erroneously referred to as the “double Windsor” due to the existence of the half Windsor knot, the Windsor is the most traditional knot, and probably the one you first learned to make. This type of knot is all-purpose, and is appropriate for business meetings, interviews and anywhere else you need to look respectable.
1- Place the tie around your neck with the skinny end hanging on one shoulder and the thicker end on the other shoulder. Of course, make sure the label of your tie is facing your shirt and not the outside world.
2- Adjust the length of the skinny end by making it longer or shorter, depending on the size of your neck. Generally, if you have a large neck, you'll need the skinny end to initially hang longer on your shoulder than the thicker end on the opposite shoulder. If you have a small neck, the lengths of the thin and fat ends will be about equal around your neck prior to making your knot.
3- Cross the fat portion over the skinny end to make an X fairly close to your neck (around about the second button on your dress shirt).
4- Fold the larger end around the smaller end; loop the fat end through the neck and pull the two ends slightly apart so that the larger end is on one side of your body and the thinner end is on the other. Consider your work so far to be the first “knot.”
5- Take the bigger end of the tie and fold it behind your first “knot,” then loop the larger end toward you through the noose of the neck to form a second “knot,” and pull this one tight. At this point, you should be able to see the label on the larger end of your tie (in other words, it should not be facing your shirt).
6- To complete the final knot, fold the larger end around the two other “knots” you created previously (thus covering them both up) and loop it through the noose again.
7- Lastly, stuff the larger end through the now single knot and tighten your tie carefully.
Reference link: http://au.askmen.com/fashion/fashiontip_300/307_fashion_advice.html#ixzz1sTq9eSin
Directions for Folding and Presenting Your Hankie Wedding Favor


1: Fold the handkerchief in half along the diagonal and iron the handkerchief flat.
2.Fold one corner of the handkerchief towards the center two-thirds of the way across.
3.Fold the other corner of the handkerchief towards the center overlapping the fold in step 2.
4.Fold the top corner of the handkerchief downwards to form an envelope
5.Punch a hole in the preprinted cardstock and run one end of the ribbon through the hole
6.Wrap the ribbon around the handkerchief envelope and tie a bow
7.Congratulations! You now have a lovely hankie wedding favor
From--- http://bumblebeelinens.com/hankieweddingfavor.php
Subscribe to:
Posts (Atom)


